
Photographing Mont Saint‑Michel can feel like stepping onto a stage where history, sea, and sky converge.
Photographing Mont Saint‑Michel can feel like stepping onto a stage where history, sea, and sky converge. The tidal island’s silhouette against shifting light offers endless creative possibilities, but capturing its essence requires more than pointing and shooting. This guide distills the latest 2026 techniques, from timing the tide to fine‑tuning camera settings, so you can produce images that stand out in any portfolio.
What is the best time of day to capture Mont Saint‑Michel?
The most rewarding light arrives during the golden hour, roughly the hour after sunrise and the hour before sunset. During these windows the sun sits low on the horizon, casting long shadows that accentuate the Abbey’s stone ribs and the surrounding sandbanks. Because Mont Saint‑Michel sits on a tidal island, the low sun often reflects off the water, creating a warm rim that separates the structure from the sky. Photographers who aim for dramatic contrast should position themselves on the north side for sunrise and the south side for sunset, allowing the sun to illuminate the façade rather than backlight it.
Seasonal weather patterns also shape the optimal moment. In spring and early autumn, the sky tends to stay clear longer, providing consistent golden hour conditions. Summer can bring thicker cloud layers that diffuse the light, which some shooters prefer for a softer, pastel‑toned sky. Conversely, winter storms generate dramatic clouds that frame the island, but the shortened daylight demands precise planning. Checking a reliable forecast and adjusting the “best time to photograph Mont Saint‑Michel” accordingly can make the difference between a flat image and a compelling composition.
How can I photograph Mont Saint‑Michel during low tide?
Low tide reveals a broad expanse of sand and shallow water that mirrors the island, turning the scene into a natural canvas for reflections. This is the ideal moment for the Mont Saint‑Michel low tide photos that showcase the Abbey floating on a glass‑like surface. To maximize the effect, arrive at least 30 minutes before the tide recedes fully, set up a sturdy tripod on firm ground, and frame the shot so that the horizon sits low in the frame, allowing the reflection to dominate the lower third of the image.
Safety and timing are critical. The tide can return quickly, especially during spring tides, so consult an up‑to‑date tide table and set an alarm for the predicted high‑water mark. A neutral density (ND) filter becomes useful when the sun is high, enabling longer exposures that smooth the water without overexposing the sky. Pair the ND filter with a low ISO and a modest aperture (f/8‑f/11) to retain depth of field while preserving detail in both the foreground sand and the distant Abbey.
| Aspect | Low Tide | High Tide |
|---|---|---|
| Composition potential | Reflections, leading lines across sand, expansive foreground | Focused on silhouette, limited foreground |
| Lighting challenges | Often brighter, may need ND filter for long exposures | Soft diffused light, easier exposure balance |
| Access considerations | Walkways exposed, risk of rapid water rise | All pathways safe, limited creative angles |
| Typical shutter speed | 1‑2 seconds (with ND) to capture smooth water | 1/125‑1/250 s for crisp details |
Which camera settings work best for Mont Saint‑Michel sunrise shots?
For Mont Saint‑Michel sunrise photography, start with a base ISO of 100‑200 to keep noise low, especially when you plan to enlarge the final image. A wide‑angle lens (14‑24 mm on full‑frame or 10‑20 mm on APS‑C) captures the sweeping landscape and the towering Abbey in a single frame. Set the aperture between f/8 and f/11 to ensure the foreground sand, the Abbey, and the distant sky stay sharply rendered. Use a sturdy tripod and engage the camera’s mirror‑lockup or electronic shutter to minimize vibration.
Because sunrise light can shift rapidly, enable exposure bracketing (±2 EV in three steps) and consider shooting in RAW. This provides flexibility to blend exposures later, preserving detail in both the bright sky and the darker stonework. If you prefer a single exposure, aim for a shutter speed that yields a proper exposure meter reading around the middle of the histogram, then fine‑tune with exposure compensation. Finally, apply the Mont Saint‑Michel composition guide: place the Abbey off‑center using the rule of thirds, incorporate the receding tide line as a leading element, and watch for stray clouds that can add visual interest without overwhelming the scene.
What lenses are ideal for shooting the Mont Saint‑Michel architecture?
The medieval silhouette of Mont Saint‑Michel is best captured with lenses that can handle both sweeping vistas and intricate stonework. A fast wide‑angle zoom (16‑35 mm on full‑frame) offers the flexibility to frame the abbey against the sky while still allowing you to step back and include the surrounding tidal flats. Its constant f/2.8 aperture helps preserve detail in low‑light dawn or dusk scenes without raising ISO excessively.
For tighter compositions—such as the ribbed vaults, the ornate façade, or the play of light on the cloister’s arches—a short‑telephoto prime (35‑50 mm, f/1.4‑f/2) provides a natural perspective that avoids the distortion typical of ultra‑wide lenses. This focal range lets you isolate architectural elements while still feeling connected to the larger structure.
If you have access to a tilt‑shift lens, consider a 24 mm or 45 mm model. The ability to control the plane of focus lets you keep the abbey’s vertical lines perfectly parallel, eliminating converging‑line distortion that can otherwise make the tower appear to lean. Although more specialized, a tilt‑shift lens produces images that read as technically precise, which is valuable for architectural portfolios.
| Lens Type | Typical Focal Length (FF) | Best Use | Pros | Cons |
|---|---|---|---|---|
| Wide‑angle zoom | 16‑35 mm | Full‑site panoramas, sunrise silhouettes | Versatile, fast aperture, covers large scene | Potential edge distortion, heavier |
| Standard prime | 35‑50 mm | Detail shots of arches, cloister, interior | Sharp, natural perspective, low light performance | Fixed focal length, less flexible framing |
| Tilt‑shift | 24 mm or 45 mm | Architectural correction, perspective control | Eliminates converging lines, creative control | Expensive, slower aperture, learning curve |
| Short‑telephoto zoom | 70‑200 mm | Isolated details, distant viewpoints across the bay | Compression effect, isolates subjects | Bulkier, may need tripod for stability |
How do I avoid crowds in Mont Saint‑Michel photos?
Peak visitor flow can obscure the clean lines and subtle lighting that make Mont Saint‑Michel compelling. Planning around the tide schedule is the first line of defense: low tide reveals expansive sand flats that are less trafficked, while high tide often concentrates people on the causeway. Arriving just before the tide begins to turn gives you a window when the area is relatively empty.
Seasonal timing also matters. The shoulder months of April, May, September, and October experience fewer tourists, and the weather still offers the soft, diffused light ideal for architecture photography. When you must shoot during the high season, consider using a longer focal length to compress the scene and push crowds into the background, or frame through architectural elements to create natural barriers.
- Set your alarm for the earliest sunrise slot (often before 6 am) and position yourself on the western bank for unobstructed silhouettes.
- Purchase a timed entry ticket for the abbey and use the allotted slot to access interior spaces before the main tour groups arrive.
- Explore secondary viewpoints such as the “Porte du Bœuf” side gate or the small garden terraces on the north side; these spots receive fewer visitors.
- Use a tripod with a remote shutter release to capture long exposures that blur moving people into ghost‑like streaks, effectively removing them from the frame.
- Take advantage of the tide‑change interval (approximately 30 minutes) when the causeway is partially submerged; foot traffic drops dramatically during this period.
- Visit on a weekday rather than a weekend; local commuters and school groups are less likely to be present.
- Consider shooting during the “golden hour” after sunset when the site is illuminated but most tourists have left the premises.
Can I use a drone to capture Mont Saint‑Michel and what are the regulations?
French civil aviation law permits drone flights for recreational purposes, but Mont Saint‑Michel falls under several restrictions due to its historic status and proximity to the airport in Rennes. All drones weighing more than 250 g must be registered with the French Directorate General for Civil Aviation (DGAC). Operators need to complete the online “Attestation de connaissance” exam and carry proof of registration while flying.
The site is classified as a “Zone Class D” airspace, which imposes a ceiling of 120 m (400 ft) above ground level and a mandatory 500 m (1,640 ft) horizontal distance from crowds, public gatherings, and heritage structures. A specific “No‑fly” radius of 500 m surrounds the abbey itself, meaning that direct overhead shots of the monument are prohibited without a special permit from the Prefecture of Manche.
If you obtain a temporary authorization—typically granted for professional media projects—you may launch from the outer perimeter of the tidal flats, maintaining the required distance and altitude. Even with permission, you must respect local wildlife, especially during nesting season for birds that use the surrounding marshes. For most travelers, ground‑based perspectives using a telephoto lens or a handheld gimbal provide a safe and legally uncomplicated alternative.
How should I compose my shots to highlight the Mont Saint‑Michel silhouette?
Start by positioning yourself on the western shoreline where the tide recedes most dramatically. This angle frames the Abbey against the sky, allowing the iconic spire to dominate the composition. Use a wide‑angle lens to capture the full sweep of the sandbars while keeping the vertical lines of the structure straight; a slight tilt can exaggerate height, but keep the horizon level to avoid distortion.
During the golden hour, place the sun just behind the island. The resulting backlight creates a crisp outline that separates the stonework from the sky. Position the sun at a low angle and experiment with placing the Abbey off‑center, following the rule of thirds. This placement adds visual tension and draws the eye across the tidal flats toward the silhouette.
When you have a clear view of the sky, consider incorporating clouds as a texture behind the silhouette. A partially overcast sky softens the contrast, while a few dramatic clouds can add depth. Use the viewfinder or electronic display to check that the Abbey’s outline remains distinct, adjusting exposure compensation as needed to prevent the sky from blowing out.
What accessories help achieve sharp Mont Saint‑Michel images?
A solid tripod is the foundation for any long‑exposure work on the tidal flats. The shifting sands can cause subtle camera movement, and a sturdy three‑leg stand ensures the sensor remains still for exposures that last several seconds. Pair the tripod with a remote shutter release or the camera’s built‑in timer to eliminate the final tap that could introduce blur.
Neutral density (ND) filters become essential when you want to smooth water or capture motion during daylight. A 6‑stop ND allows you to keep the aperture wide for depth of field while extending shutter speed to several seconds, rendering the surrounding sea as a silky surface that emphasizes the solid silhouette.
- Carbon‑fiber tripod with a ball head for quick adjustments
- 6‑stop ND filter compatible with your lens diameter
- Wireless remote shutter release or 2‑second timer
- Circular polarizing filter to reduce glare on wet stone
- Wide‑angle lens (14‑24mm on full‑frame, 10‑16mm on APS‑C)
- Spare batteries, especially for mirrorless bodies that consume power quickly
- Microfiber cleaning cloth and blower for sand removal
How do weather conditions affect Mont Saint‑Michel photography?
Clear skies provide high contrast, making the silhouette pop, but the harsh light can also create deep shadows that hide architectural details. On overcast days, the diffused light reduces contrast, allowing you to capture texture on the Abbey’s stonework without resorting to flash or high ISO settings. This softer lighting is ideal for interior shots through the windows of the Abbey.
Wind plays a subtle role on the sandbars. A gentle breeze lifts fine particles, adding a sense of movement to the foreground. However, strong gusts can shift the tide faster, so monitor tide tables closely and plan your arrival with enough margin to avoid being caught by a sudden surge.
Fog is a seasonal phenomenon that can transform the scene into a low‑contrast tableau, with the island emerging like a ghostly form. When fog rolls in, increase exposure compensation slightly to retain detail in the mist, and consider using a higher ISO to maintain a reasonable shutter speed without sacrificing sharpness.
What post‑processing techniques enhance Mont Saint‑Michel photos?
Start with a RAW file to preserve the full dynamic range captured during sunrise or sunset. Bracket exposures and merge them into an HDR image; this balances the bright sky against the stone walls without crushing highlights. Apply a modest dehaze filter to cut through the coastal mist, then fine‑tune contrast and saturation to bring out the warm limestone tones while keeping the shadows natural.
Correct perspective distortion that often appears when shooting from low angles with wide‑angle lenses. Use lens‑profile correction to eliminate barrel distortion, then employ cloning or content‑aware tools to remove stray tourists or power lines. A subtle gradient filter can darken a bright horizon, and sharpening should be applied selectively to the architectural details. Export a high‑resolution JPEG for print and a compressed version for social platforms, preserving the original file for future edits.
What else should travelers know about None?
Access to the island is dictated by the tide, which can shift several meters every hour. Check the official tide table the night before your visit and plan to arrive at least 30 minutes before the water reaches its highest point; otherwise you may be forced to wait on the causeway. Early morning or late afternoon visits usually coincide with lower crowds and softer light.
Tickets for the abbey and museum are sold on a timed‑entry basis, so booking online in advance reduces queue time. The site offers wheelchair‑friendly routes, but some upper‑level chambers remain inaccessible due to historic staircases. Restrooms, a small visitor centre, and a café are located near the main entrance; bring a refillable water bottle, as there are limited drinking fountains on the island.
Recommended Mont Saint-Michel Activities
Frequently Asked Questions
Is it allowed to photograph inside the Abbey of Mont Saint‑Michel?
Photography for personal use is permitted in most interior spaces, provided that flash is disabled and tripods are not obstructing foot traffic. Certain chapels and the cloister restrict any kind of shooting to protect delicate artworks, so look for signage before raising your camera.
Do I need a permit for professional photography at Mont Saint‑Michel?
Commercial crews must obtain a permit from the local heritage authority, especially if they plan to use lighting equipment, drones, or large support teams. The application process includes a fee and a review of the proposed impact on visitors and the historic fabric.
What is the best season for photographing Mont Saint‑Michel?
Late spring and early autumn provide clear skies, moderate temperatures, and fewer tourists than peak summer. The angle of the sun during these months creates long shadows that accentuate the abbey’s vertical lines, while the surrounding salt‑marshes display subtle colour shifts.
How far should I stand to get a full view of Mont Saint‑Michel?
A distance of 200–300 meters from the causeway offers a balanced perspective that captures both the island’s silhouette and the surrounding tidal flats. From this range you can include foreground elements such as the sandbars, which add depth without overwhelming the composition.
Can I photograph Mont Saint‑Michel at night?
Nighttime shooting is allowed, but the abbey is illuminated only on select evenings during cultural events. Outside those dates the site is dark, and flash is prohibited. Use a fast lens and a high ISO, and be prepared for longer exposures on a sturdy tripod.
What are the recommended ISO settings for Mont Saint‑Michel in low light?
Start with ISO 800–1600 on a full‑frame sensor; this range provides sufficient sensitivity while keeping noise manageable. If you have a camera with excellent high‑ISO performance, you can push to ISO 3200, but apply noise‑reduction in post‑processing to retain detail in the stonework.
How can I protect my gear from the salty sea air at Mont Saint‑Michel?
Wipe the exterior of your camera and lenses with a microfiber cloth after each shooting session, and keep a sealed plastic bag handy for longer exposures. Consider using a weather‑sealed camera body and a lens with a protective filter to guard against corrosion.
Are drones permitted for aerial shots of Mont Saint‑Michel?
Drone flights are restricted within a 5‑kilometre radius of the site to preserve the visual integrity of the landmark and to avoid conflicts with aircraft. Special permits may be granted for professional productions, but they require a detailed flight plan and coordination with local authorities.
By planning your timing, respecting local regulations, and applying thoughtful post‑processing, you can capture images of Mont Saint‑Michel that stand out in any portfolio. Keep your equipment clean, stay aware of the tide, and let the island’s timeless architecture guide your creative decisions.
More Mont Saint-Michel travel guides
- How to Photograph Mont-Saint-Michel Like a Pro
- Is the Mont Saint-Michel Tide Experience Worth It?
- Mont Saint-Michel Festivals and Events in 2026: A Complete Calendar
- Moonlit Paths Hidden Views: A Couples Evening Walk
- Uncover Mont-Saint-Michel's Secret Gardens Tranquil Trails
- Best Hiking Trails Around Mont-Saint-Michel
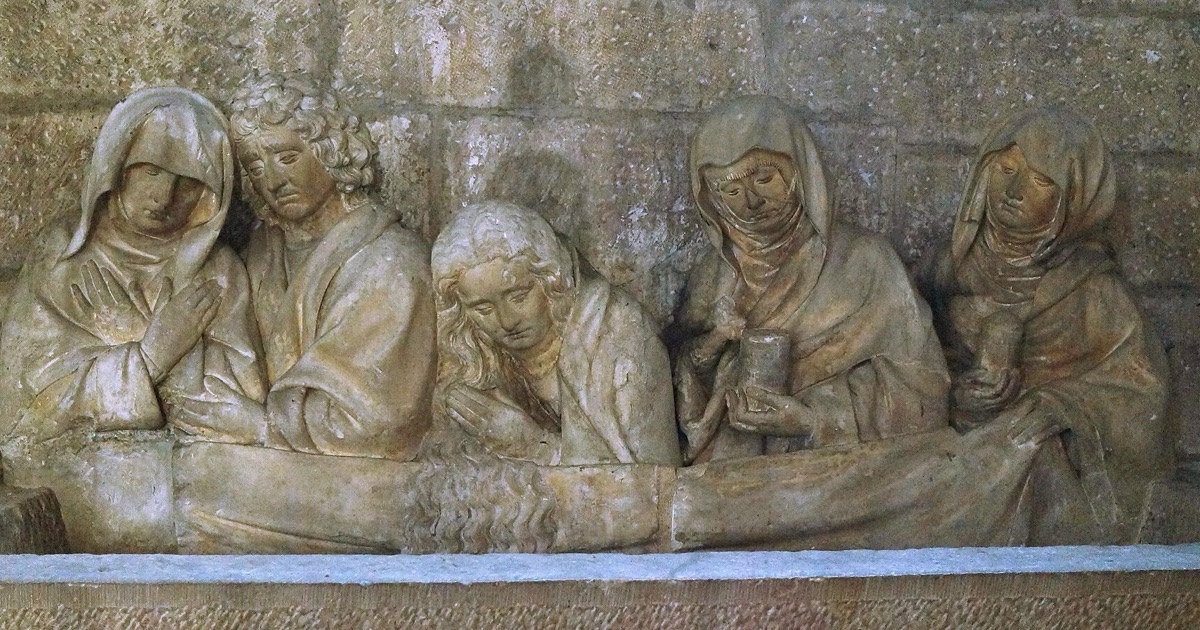
Cover photo: Dijon.- Église Saint-Michel le groupe sculpté de la Mise au tombeau ( xve siècle).jpg by Pierre André Leclercq · CC BY-SA 4.0 via Wikimedia Commons
Travel Community
Heading to Mont Saint-Michel?
Connect with fellow travelers going to Mont Saint-Michel, swap first-hand tips, and find travel companions for your dates — free to join.
Connect with Mont Saint-Michel travelersReviewed by our editor for Europe
Marco BianchiEurope Editor
Europe travel writer focused on city culture, museums and historic routes across the continent.
More articles by Marco Bianchi →